
The iPhone Magnifier is a powerful accessibility feature that transforms your device into a digital magnifying glass, providing essential visual assistance for users of all needs. This comprehensive guide will walk you through everything you need to know about utilizing the Magnifier feature, from basic setup to advanced customization options.
The Magnifier feature serves as more than just a simple zoom tool – it’s a sophisticated accessibility aid designed to help users read small text, examine fine details, and navigate low-vision scenarios with confidence. Whether you’re struggling to read a restaurant menu in dim lighting or need to examine product labels more closely, the iPhone Magnifier offers a convenient, always-available solution.
What is the Magnifier?
The Magnifier is a built-in iOS accessibility feature that leverages your iPhone’s camera system to create a customizable digital magnifying glass. Unlike simply using the Camera app for magnification, the Magnifier includes specialized tools designed specifically for visual assistance and accessibility needs.
How to Enable the Magnifier
The quickest way to enable Magnifier:
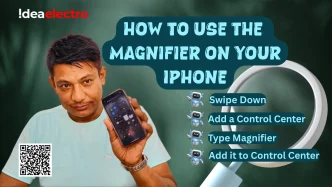
1. Open Control Center by Swiping down on the Home Screen.
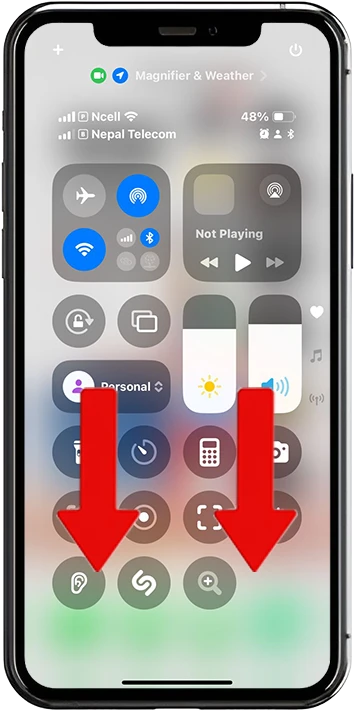
2. Tap and Hold empty space and tap on Add a Control.
![]()
3. Search for Magnifier and tap on “Magnifier” (For Access follow same procedure by swiping down from the top-right corner).

4. Tap the Magnifier icon to launch the feature.
![]()
Using the Magnifier
Once opened, the Magnifier uses your iPhone’s camera to display a zoomed-in view of objects or text. Here’s how to use its core features:
1. Adjust Zoom Level
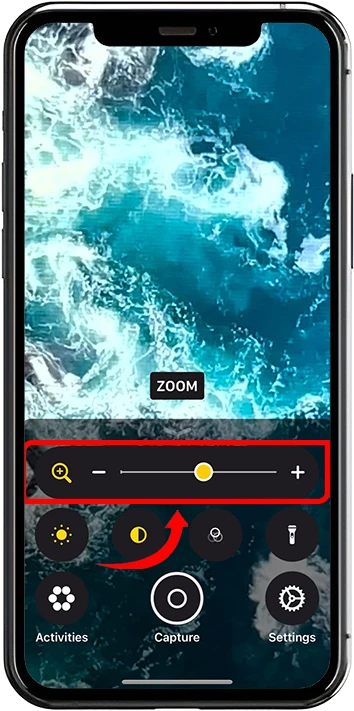
- Use the slider at the bottom of the screen to adjust magnification (from 1x to 15x, depending on your device).
- Pinch the screen with two fingers to zoom in or out for more precise control.
2. Capture a Still Image
- Tap the shutter button (circle icon) to freeze the image.
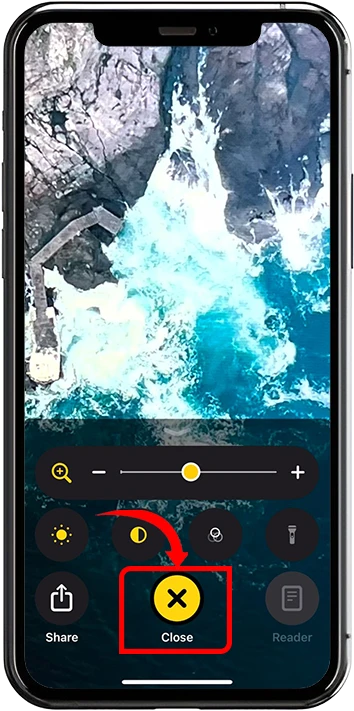
- Adjust zoom or other settings without moving the phone.
- Tap the shutter button again to return to live view.
3. Adjust Brightness and Contrast
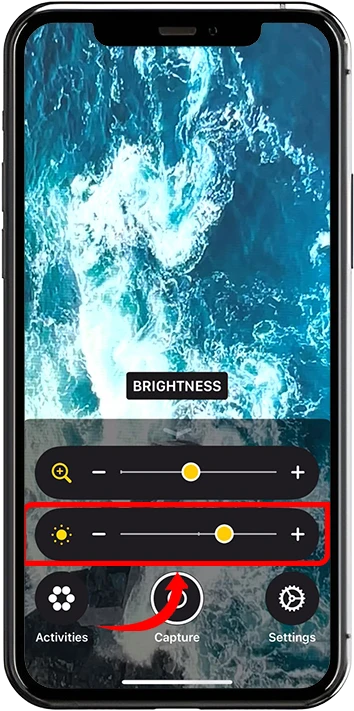
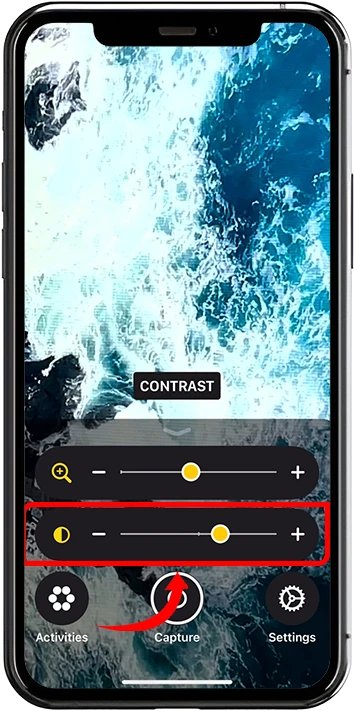
- Tap the sun icon to adjust brightness and contrast sliders.
- Increase brightness for better visibility in dim environments or enhance contrast for clearer text.
4. Apply Filters
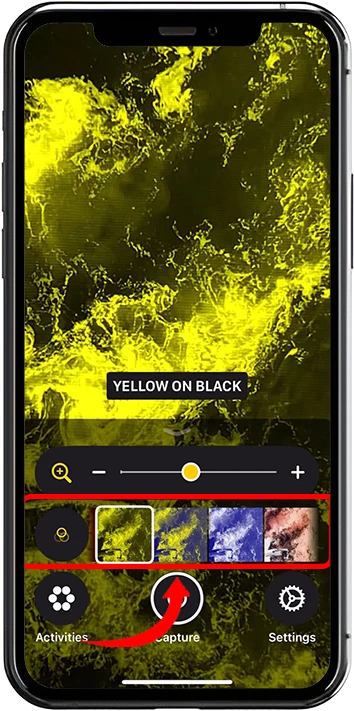
- Tap the filter icon (three circles) to apply color filters, such as grayscale, red/green, or inverted colors, to improve visibility for specific needs.
- Filters are especially helpful for users with visual impairments.
5. Turn On the Flashlight
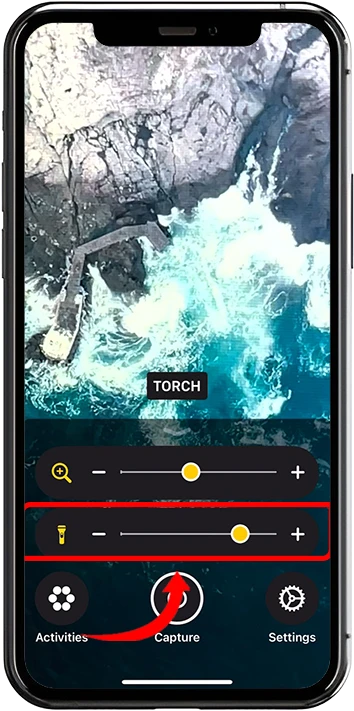
- Tap the flashlight icon to illuminate the subject in low-light conditions.
- Adjust the flashlight intensity if needed for better clarity.
Why Use Magnifier?
The Magnifier is a versatile tool for anyone, not just those with visual impairments. It’s perfect for:
- Reading small text on packaging, receipts, or prescriptions.
- Inspecting details on jewelry, electronics, or crafts.
- Assisting in low-light environments or for colorblind users with tailored filters.
By mastering the Magnifier, you can transform your iPhone into a portable, customizable magnifying glass that enhances your ability to see the world clearly.