

In both home electronics and automotive systems, the fuse is a silent, humble guardian. Its sole purpose is to fail—sacrificing itself to protect more valuable circuitry from dangerous overcurrent. As an enthusiast who has traced countless electrical faults, I have learned that efficiently diagnosing a blown fuse is the foundational skill in any troubleshooting process. The following guide, drawn from personal experience, outlines the logical steps to confirm a fuse’s condition.
Immediate Symptoms of a Blown Fuse
The first clues are often operational. You may notice a sudden, specific power loss. For instance, in a car, the radio may fall silent while the headlights remain bright. In a home, a single lamp may go dark while others on the same circuit stay lit. This specificity is key. It helps distinguish a blown fuse from a tripped circuit breaker, which typically cuts power to an entire section of a room.
Just before this loss, you might have received sensory warnings. A faint burning smell or a sharp popping sound from the general direction of a fuse panel or appliance is a strong indicator. This often accompanies a more dramatic failure where the fuse element vaporizes. Noting these immediate symptoms provides critical context before you ever open a fuse box.
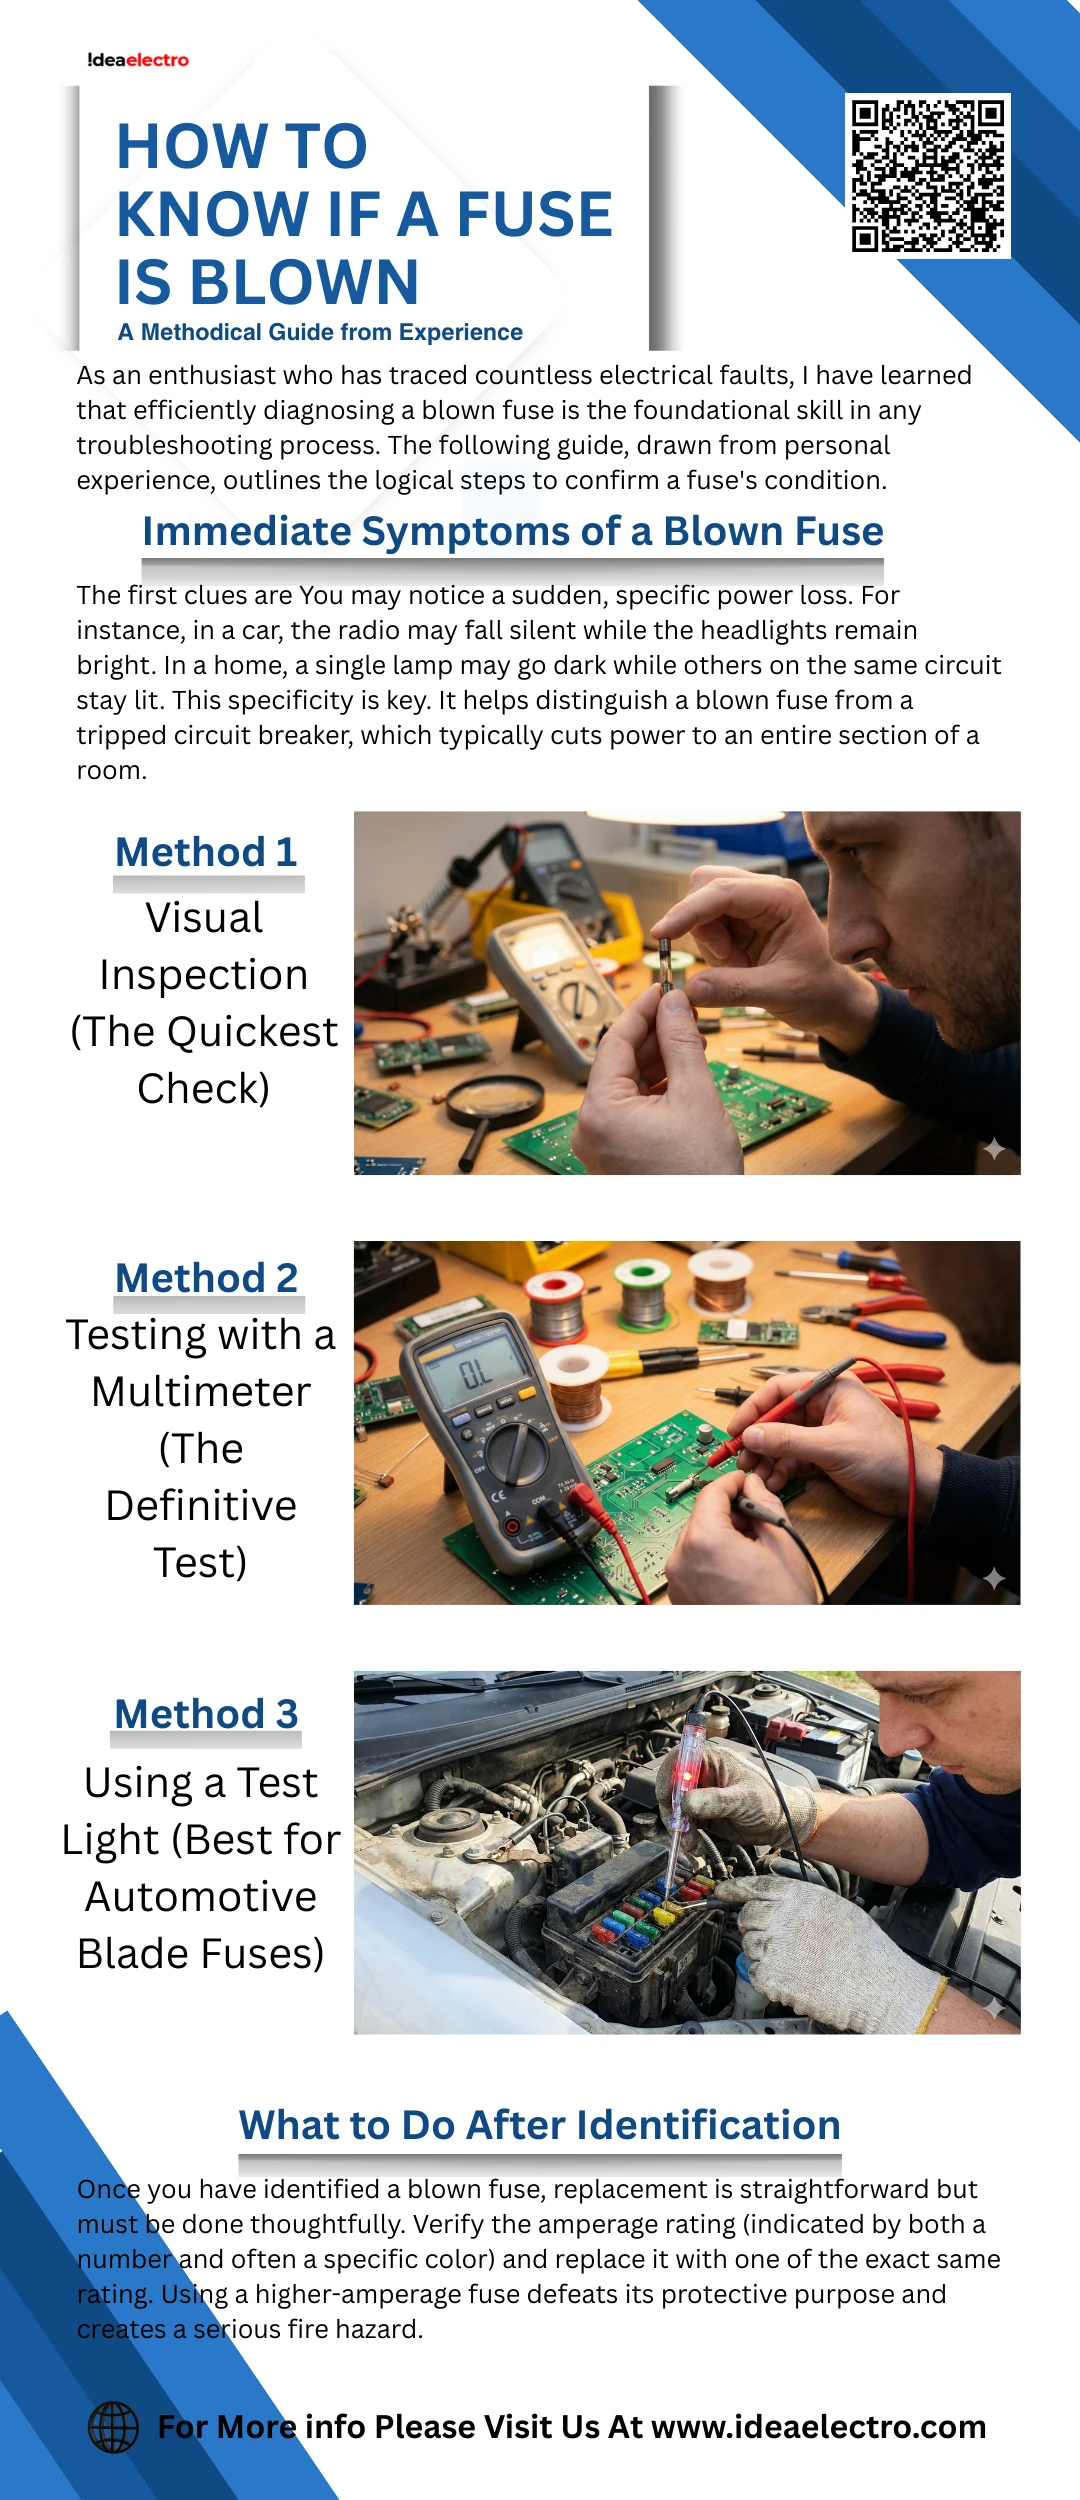
Method 1: Visual Inspection (The Quickest Check)
Your first physical step is to locate the fuse. In vehicles, consult your manual; common locations are under the dashboard, in side panels, or under the hood. Home fuses are typically found in a main service panel.
For common glass or transparent plastic blade fuses, a visual check can be definitive. Hold the fuse up to a light. Focus on the thin metal filament inside. A visible gap, break, or separation in this wire confirms the fuse is blown. Often, you may also see discoloration: a dark, smoky smear or a clouded glass tube. This residue, a result of the internal arc, is clear evidence of failure. In more severe cases, the plastic casing itself may be melted or a ceramic body may be cracked. If you see any of these signs, the fuse has served its purpose.
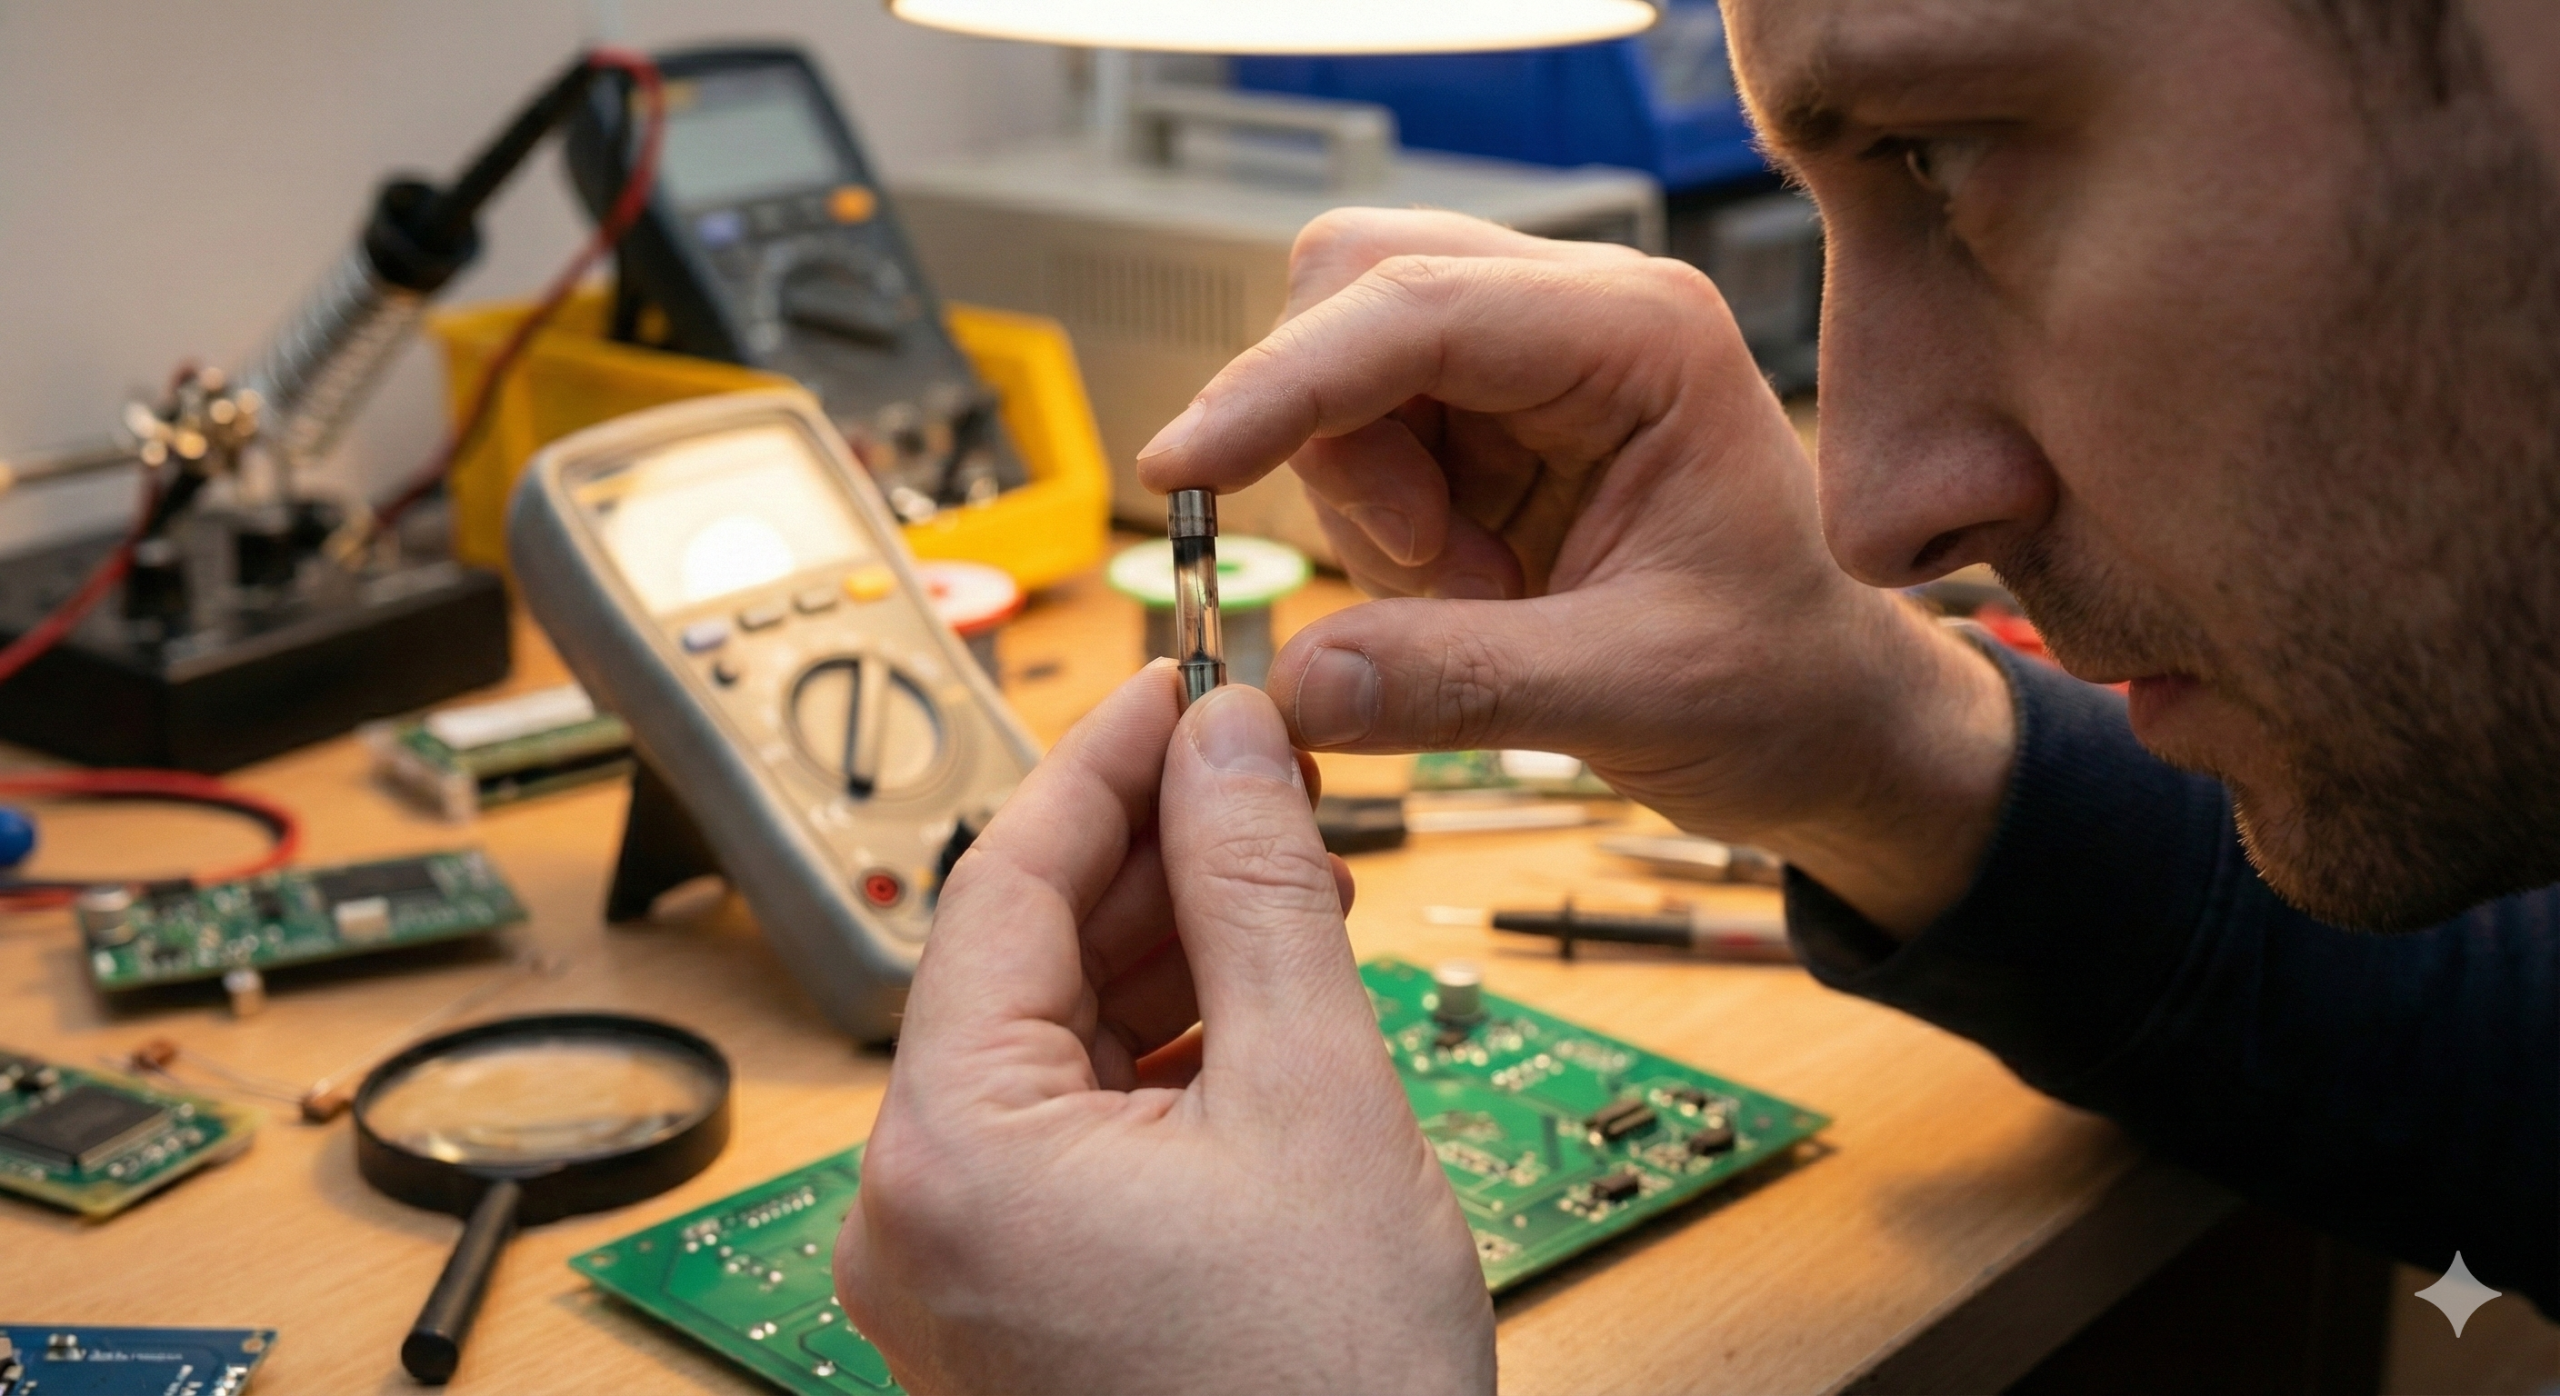
Method 2: Testing with a Multimeter (The Definitive Test)
Visual inspection is useless for opaque ceramic, cartridge, or sand-filled fuses. Here, the multimeter is your essential tool. Always ensure the fuse is removed from its circuit before testing to prevent misleading readings.
You have two reliable options:
- Continuity Mode (The Beep Test):Set your multimeter dial to the continuity symbol (∙∙)). Touch the probes to each end of the fuse. A continuous beep indicates an intact path—the fuse is good. Silence means the path is broken and the fuse is blown.
- Resistance (Ohms) Mode:Set the meter to the lowest Ohms setting (e.g., 200Ω). Place the probes on the fuse ends. A reading very near 0 Ohms indicates continuity. A reading of “OL” (Open Loop) or infinity confirms the fuse is blown.
In my practice, the multimeter’s objective data removes all doubt, making it the most reliable method across all fuse types.

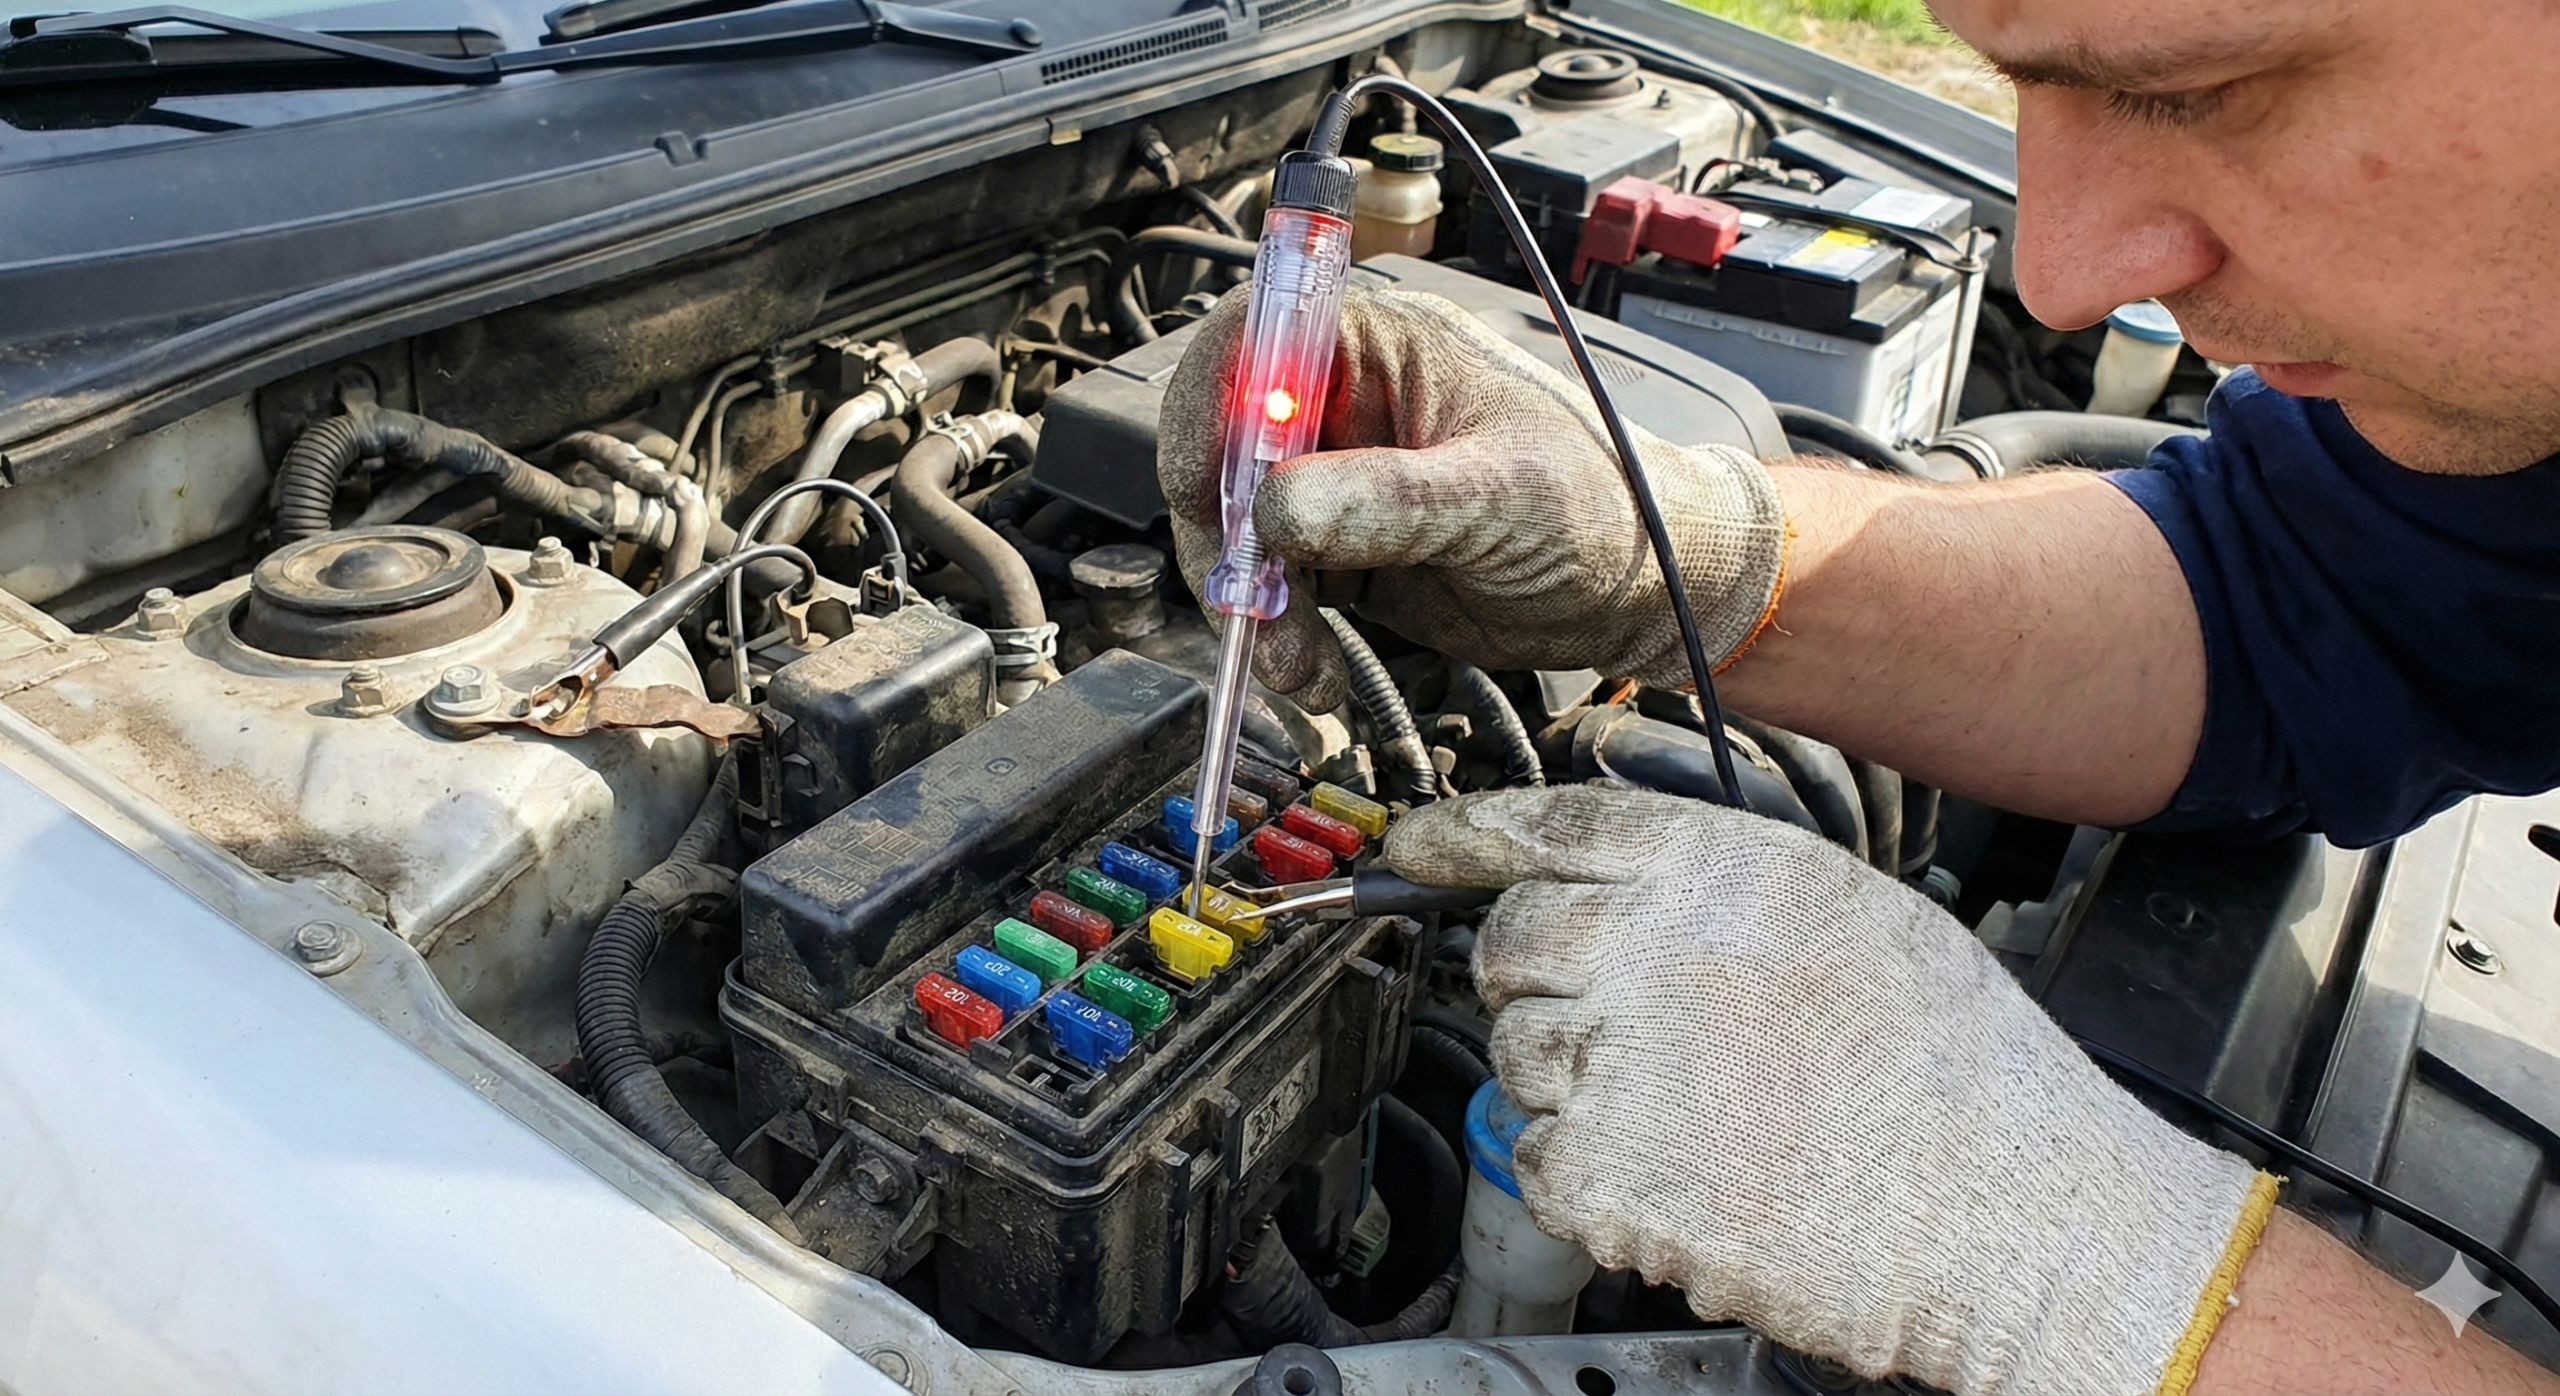
Method 3: Using a Test Light (Best for Automotive Blade Fuses)
For quick checks on a live vehicle circuit, a test light is exceptionally practical. First, ground the tool by clipping its alligator clip to a clean, bare metal point on the vehicle’s chassis.
With the circuit powered on (e.g., ignition switched to “accessory” for a radio circuit), probe the exposed metal test points on the top of the installed fuse.
- If the light illuminates on both test points, current is flowing through the fuse normally; it is good.
- If the light illuminates on only one side, power is reaching the fuse but not passing through it. This is a clear sign the fuse is blown.
- If the light does not illuminate on either side, the fault lies elsewhere—perhaps an upstream relay, switch, or connection has failed.
This method is invaluable for rapid diagnostics without removing fuses.
What to Do After Identification
Once you have identified a blown fuse, replacement is straightforward but must be done thoughtfully. Verify the amperage rating (indicated by both a number and often a specific color) and replace it with one of the exact same rating. Using a higher-amperage fuse defeats its protective purpose and creates a serious fire hazard.
Crucially, you must ask: Why did it blow? A one-time failure in an old fuse can happen. However, if the new fuse blows immediately or shortly after replacement, this indicates a deeper problem—a short circuit or an overloaded component. This is your signal to stop and begin investigating the connected circuit, or to seek professional repair. Replacing a fuse multiple times without addressing the root cause is both futile and dangerous.
In conclusion, diagnosing a blown fuse is a logical process of observation and verification. By starting with the symptoms, proceeding through visual or instrumental checks, and concluding with a safe, reasoned replacement, you can efficiently restore function while upholding the critical safety standards the fuse was designed to ensure.