Bullet points are a staple in document formatting, helping to organize information clearly and concisely in Microsoft Word. While Word offers a variety of default bullet styles, defining new bullets allows users to customize their documents with unique symbols, images, or fonts, adding a personal touch or aligning with specific branding needs. Custom bullets can enhance the visual appeal of lists, making your documents stand out in professional or creative contexts. This step-by-step guide is designed for beginners to intermediate Word users and applies to recent versions like Microsoft Word for Microsoft 365, Word 2019, and Word 2016. Whether you’re preparing a report, presentation outline, or creative project, mastering custom bullets will elevate your document’s presentation. Ensure you have Microsoft Word installed on your computer. If you’re starting fresh, you can create a new document to experiment with.
How to Define New Bullets in Microsoft Word
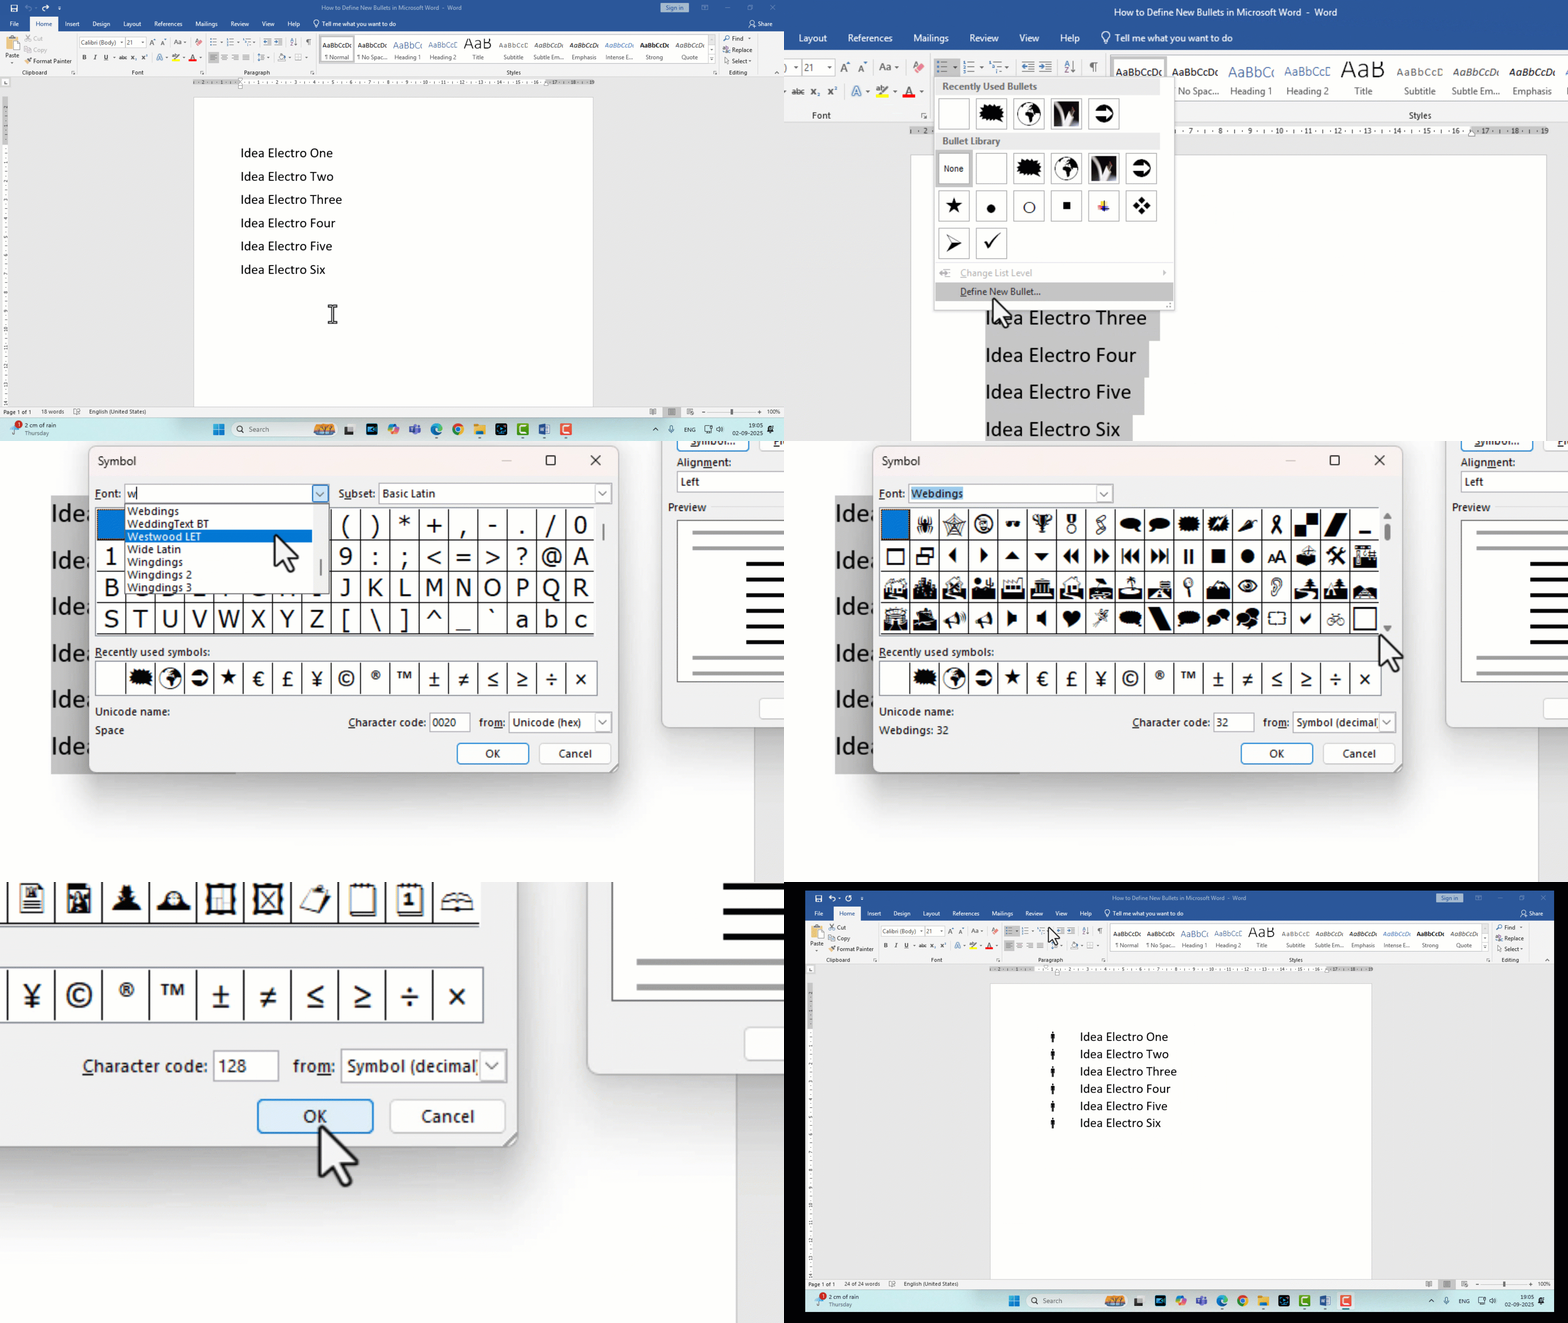
- Open your Word document where you want to keep Bullet List. Select the List; and
- Go to the Home tab on the Ribbon.
- In the Paragraph group, click the small arrow next to the Bullets icon.
- From the drop-down menu, select Define New Bullet.
- Click Symbol in the Define New Bullet dialog box.
- Browse through the available symbol fonts such as Wingdings, Webdings, or other character sets.
- Select your desired symbol (e.g., checkmarks, arrows, stars).
- Click OK to apply it as your new bullet style.

How to use Picture as Bullets in Microsoft Word
Follow these simple steps to define custom bullets using unique symbols tailored to your style.
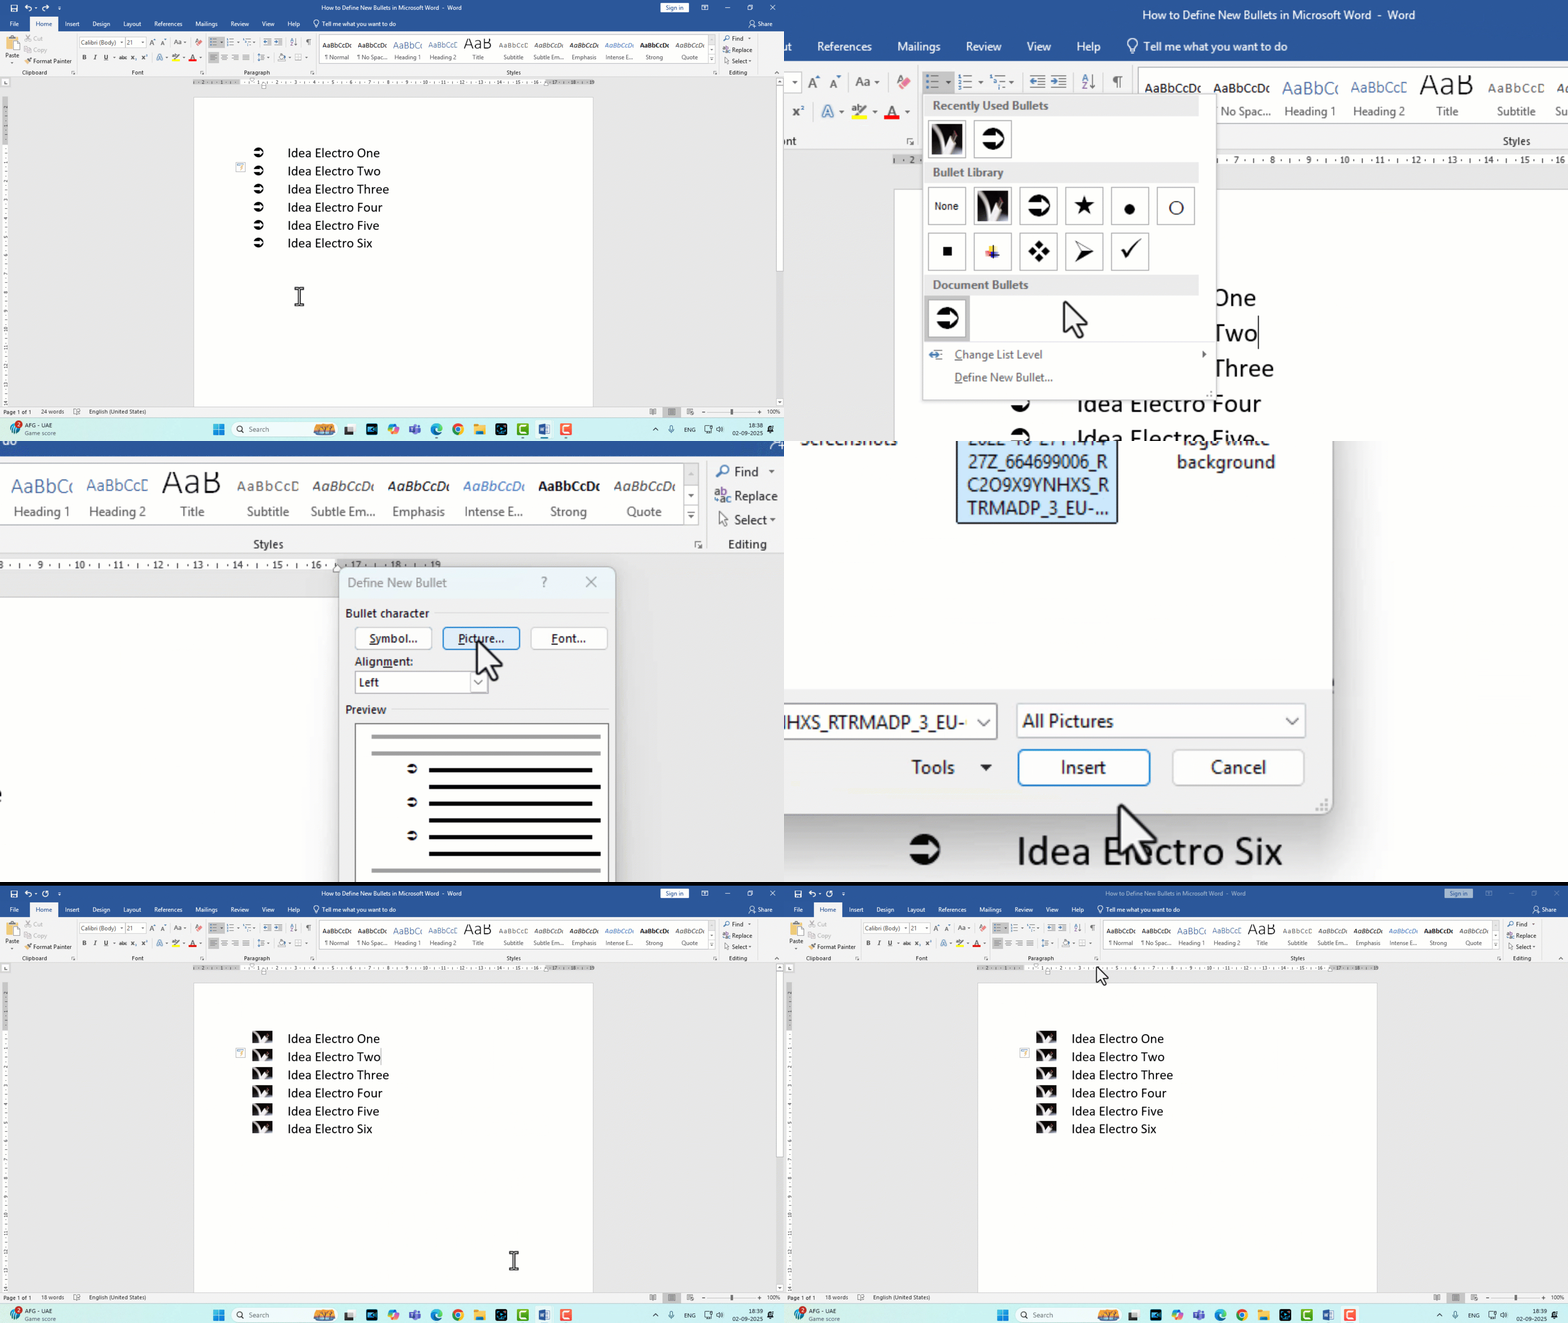
- Open your Word document.
- Go to the Home tab on the Ribbon.
- In the Paragraph group, click the small arrow next to the Bullets icon.
- From the drop-down menu, select Define New Bullet.
- Click Picture in the New Bullet dialog box.
You can choose from:
- From File
- Bing Image Search
- OneDrive – Personal
- Let’s select Image from “From File” then click Insert and OK.

Defining new bullets in Microsoft Word is a straightforward yet powerful way to customize your documents. By following these steps—accessing the bullets menu, defining a new bullet with symbols or pictures, and applying it to your list—you can create visually appealing and professional-looking documents. Experiment with different symbols, fonts, or images to match your project’s tone, whether it’s a formal report or a creative flyer. For further exploration, consider learning about custom numbering, multilevel lists, or Word’s style features to enhance your formatting skills. Try defining a new bullet in your next document and see how it transforms your lists!


