

Hyperlinks are a powerful feature in Microsoft Word that enhance document interactivity, usability & linkability. They allow users to connect to external websites, email addresses, other parts of the same document, or even external files, making navigation seamless and efficient. Whether you’re creating a professional report, an academic paper, or a personal project, hyperlinks can improve accessibility and provide quick access to additional resources. This article offers a comprehensive, step-by-step guide to adding hyperlinks in Microsoft Word, tailored for beginners, students, and professionals. The instructions are applicable to recent versions of Word, including Word 2016, 2019, 2021, and Microsoft 365. By the end, you’ll be equipped to create, format, and troubleshoot hyperlinks to make your documents more dynamic and user-friendly.
Understanding Hyperlinks in Microsoft Word
A hyperlink in Microsoft Word is a clickable element—text, an image, or an object—that directs users to another location, such as a website, an email address, a specific section within the same document, or an external file. Hyperlinks serve as digital shortcuts, enabling readers to access related information without leaving the document or manually searching for it.
There are four main types of hyperlinks in Word:
- External Website Links: Direct to webpages (e.g., linking to a company’s website).
- Email Links: Open a new email draft with a predefined recipient or subject (e.g., mailto:example@email.com).
- Internal Document Links: Navigate to specific sections, such as headings or bookmarks, within the same document.
- File Links: Connect to other files, like PDFs or additional Word documents, stored on your device or network.
Hyperlinks enhance documents by improving navigation, adding professionalism, and ensuring quick access to references. They are commonly used in reports to cite sources, in resumes to link to portfolios, or in manuals to guide users to related sections.
Preparing Your Document for Hyperlinks
Before adding hyperlinks, it’s essential to prepare your document to ensure smooth functionality. Start by organizing your content clearly—identify where hyperlinks will add value, such as references to external sources or navigation to specific sections. Determine the destinations for your links, such as reliable website URLs, correct email addresses, or specific document sections.
Ensure your document is saved in a format that supports hyperlinks, such as .docx or .pdf. Older formats like .doc may have limited compatibility. If linking to external files, confirm that the files are accessible and stored in a stable location (e.g., a shared network drive or cloud storage). For internal links, consider adding headings or bookmarks to make navigation intuitive. Taking these steps ensures that your hyperlinks function as intended and enhance the reader’s experience.
Step-by-Step Guide to Adding Hyperlinks
Adding a Hyperlink to an External Website
To link to an external website:
1. Highlight the text you want to turn into a hyperlink.

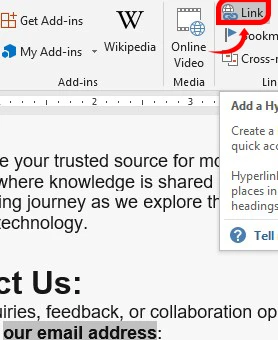
2. Go to the Insert tab on the Ribbon and select Hyperlink (or right-click the selected text and choose Hyperlink).

3. In the dialog box, select Existing File or Web Page from the “Link to” panel.
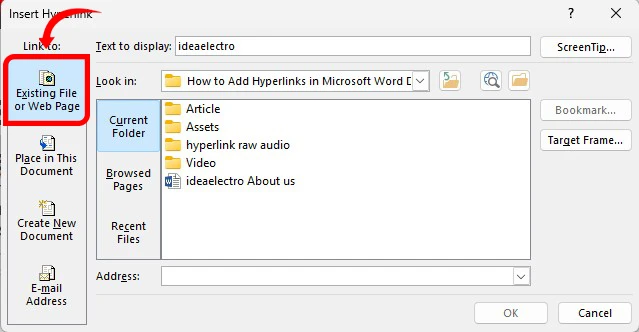
4. Enter the full URL (e.g., https://www.ideaelectro.com) in the Address
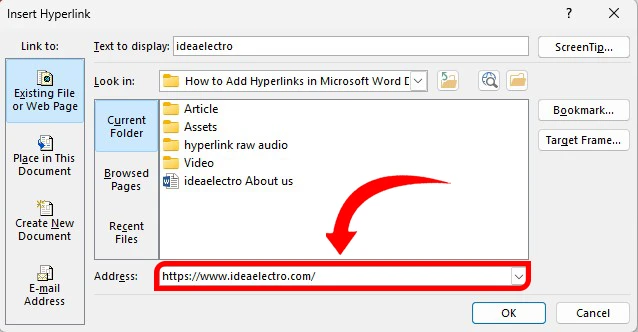
5. (Optional) Customize the display text by editing the Text to display field.
6. Click OK to insert the hyperlink.
7. Test the link by holding Ctrl and clicking it to ensure it directs to the correct website.

How to add Hyperlink on Image with “ScreenTip”?
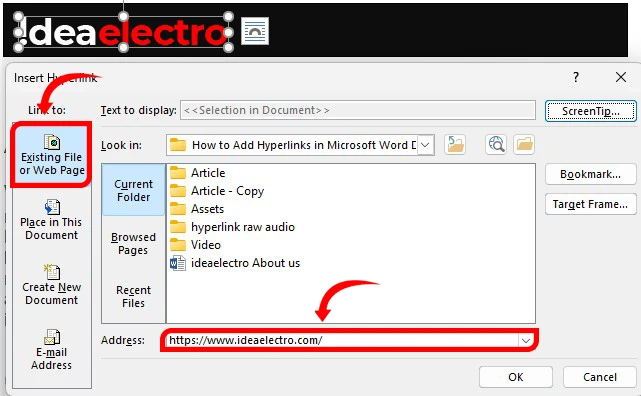
1. Select the object or image you want to turn into hyperlink.

2. Go to insert tab, Select Hyperlink in the dialog box select Existing Files or Web Page

3. Enter the full URL (e.g., https://www.ideaelectro.com) in the Address
4. Click on “ScreenTip…”, Enter “ScreenTip text” for example “Click to visit our website”
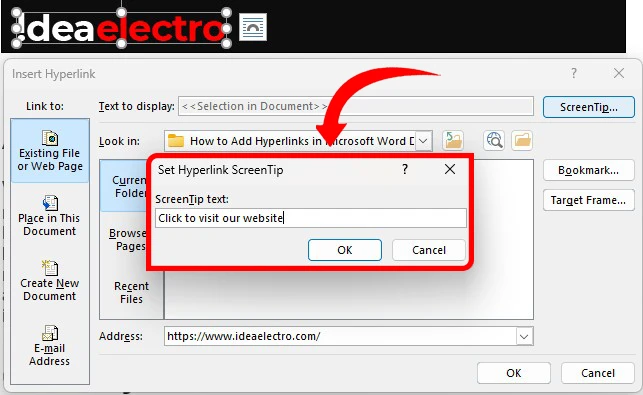
5. Click OK to insert the hyperlink.
6. Test the link by holding Ctrl Hover over the Image into document you will notice the Screen Tips “Click to visit our website”. Clicking it to ensure it directs to the correct website.

Linking to an Email Address
To create an email hyperlink:
- Select the text for the hyperlink (e.g., “Contact Us”).
2. Open the Insert Hyperlink dialog (Insert > Hyperlink).
3. Choose E-mail Address from the “Link to” panel.
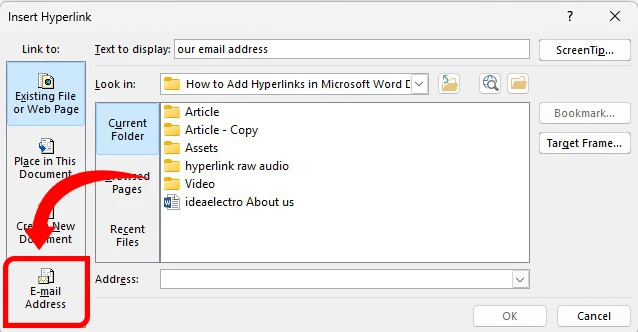
4. Enter the email address in the E-mail address field (e.g., mailto: info@ideaelectro.com). Word automatically adds the “mailto:” prefix if omitted.

5. (Optional) Add a default subject line in the Subject field (e.g., “Inquiry from Document”).
6. Click OK.
7. Test the link to ensure it opens your default email client with the correct recipient and subject.
Use clear display text (e.g., “Email Support”) and avoid sharing sensitive email addresses publicly.
Linking to another Part or Section of the Same Document
To link to a specific section within the same document: (e.g. Our Vision)
- Create a destination by adding a bookmark or using a heading:
-
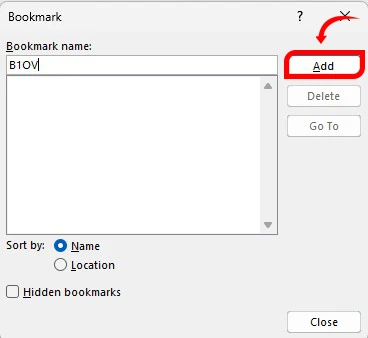
- For a bookmark, place your cursor at the desired location, go to Insert > Bookmark, enter a name (e.g. B1OV), and click Add.
-
- For a heading, apply a Heading style (e.g., Heading 2) from the Home tab.
2. Select the text to hyperlink.
3. Open the Insert Hyperlink dialog and choose Place in This Document.
4. Select the bookmark or heading from the list.
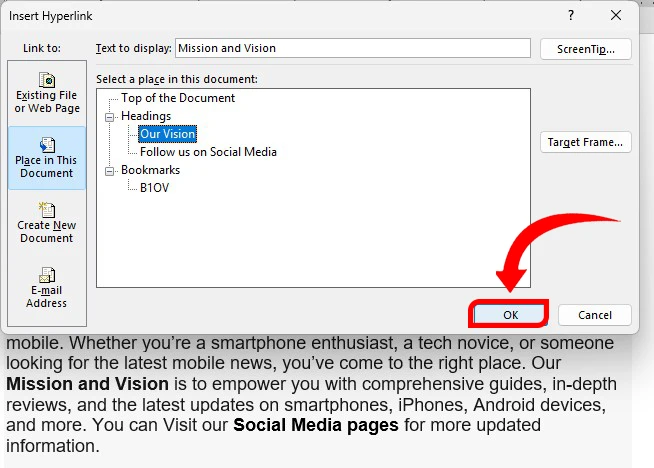
5. Click OK.
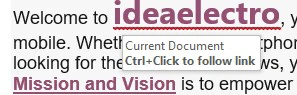
6. Test the link by Ctrl + clicking to ensure it jumps to the correct section.
This is ideal for long documents like manuals or reports, enabling quick navigation.
Linking to a File or another Document
To link to an external file:
1. Select the text or object for the hyperlink, for example (Company Profile)
2. Open the Insert Hyperlink dialog and select Existing File or Web Page.
3. Browse to the file’s location (e.g., a PDF or another Word document) and select it.
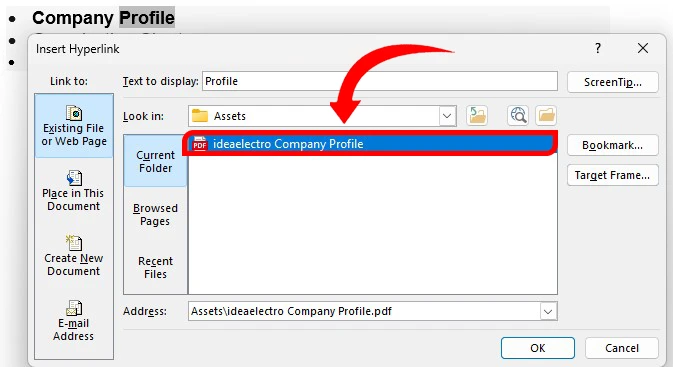
4. Click OK.
5. Test the link to ensure it opens the correct file.
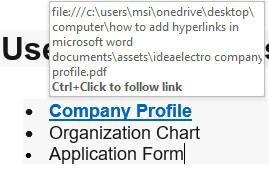
Use relative file paths (e.g., “./files/document.pdf”) if the file is stored in the same folder as your document to avoid issues when sharing. Ensure recipients have access to the linked file.
Using Keyboard Shortcuts for Faster Hyperlinking
To streamline hyperlinking:
- Select the text or object and press Ctrl + K to open the Insert Hyperlink dialog.
- Follow the steps for the desired hyperlink type.
- Use Ctrl + Click to test hyperlinks quickly.
This shortcut saves time, especially when adding multiple links.
Formatting and Customizing Hyperlinks
Hyperlinks in Word default to blue text with an underline, but you can customize their appearance:
- Change Font or Color: Select the hyperlink, go to the Home tab, and adjust the font, size, or color like regular text. Avoid removing the underline unless necessary, as it signals clickability.
- Remove Underline: Right-click the hyperlink, select Font, and uncheck Underline. Ensure the text remains distinguishable (e.g., use a bold font or distinct color).
- Apply Styles: Use Word’s Styles feature to create a consistent hyperlink format across your document (e.g., a custom “Hyperlink” style).
Keep hyperlinks visually distinct but professional, avoiding overly bright colors that may distract readers.
Troubleshooting Common Hyperlink Issues
Common hyperlink issues include:
- Broken Links: If a website or file link doesn’t work, verify the URL or file path. Edit the link by right-clicking and selecting Edit Hyperlink.
- Non-Clickable Links: Ensure the document is in a compatible format (.docx or .pdf) and that hyperlinks are enabled (check Word’s settings under File > Options > Advanced).
- Shared Document Issues: If links to files don’t work when shared, use cloud storage links (e.g., OneDrive) or ensure the file is included with the document.
To remove a hyperlink, right-click it and select Remove Hyperlink. For PDFs, test hyperlinks after exporting, as some settings may disable them.
Best Practices for Using Hyperlinks in Word
To maximize hyperlink effectiveness:
- Use descriptive display text (e.g., “Visit Our Website” instead of “Click Here”).
- Test all links before sharing the document.
- Limit the number of hyperlinks to avoid overwhelming readers.
- For internal links, use clear headings or bookmarks for intuitive navigation.
- Regularly update external links to ensure they remain active.
By following these practices, you’ll create professional, user-friendly documents that leverage hyperlinks effectively.