
Microsoft Word is a powerful word-processing tool used by millions for creating, editing, and formatting documents. One of its useful features is the ability to highlight text, which helps emphasize key points, organize content, or mark sections for review. Whether you’re a student, professional, or casual user, highlighting text can make your documents more visually effective. This article provides a step-by-step guide to highlighting text in Microsoft Word, covering multiple methods, customization options, and troubleshooting tips.
Method 1: Highlighting Text Using the Ribbon
The Ribbon, located at the top of the Word interface, is the most common way to highlight text. Follow these steps:
- Open your document in Microsoft Word.
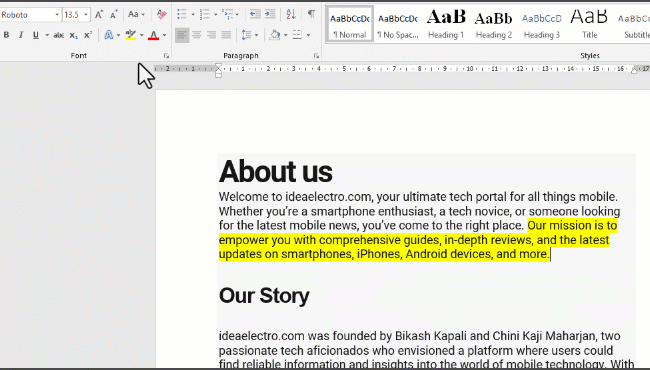
- Select the text you want to highlight. Click and drag your mouse over the text, or use keyboard shortcuts like Shift + Arrow keys to select specific sections.
- Navigate to the “Home” tab on the Ribbon at the top of the screen.
- Locate the “Text Highlight Color” button in the Font group. It typically appears as a marker icon with an “ab” symbol and a yellow colored line under it.
- Click the dropdown arrow next to the highlight button to open the color menu.
- Choose a highlight color from the available options (e.g., yellow, green, or blue). The selected text will now be highlighted in your chosen color.
- Verify the result to ensure the highlight appears as intended.
Tips: To change the highlight color, repeat the process with a different color. To remove the highlight, select “No Color” from the dropdown menu.
Method 2: Highlighting Text Using Keyboard Shortcuts
While Word doesn’t have a direct keyboard shortcut for applying highlights, you can streamline the process with keyboard navigation:
- Select the text using Shift + Arrow keys to highlight the desired portion.
- Access the highlight tool via the Ribbon (Alt + H, then I on Windows to open the highlight menu) or right-click for the Mini Toolbar.
- Use arrow keys to select a color and press Enter to apply it.
This method is ideal for users who prefer keyboard-based workflows, though it requires a few extra steps compared to mouse-based methods.
Removing Text Highlighting
To remove highlighting from text:
- Select the highlighted text you want to clear.
- Go to the “Home” tab, click the “Text Highlight Color” dropdown, and choose “No Color”.
- Alternatively, use the “Clear All Formatting” button (a small eraser icon with an “A” in the Font group). Note that this will remove all formatting, including bold, italic, or font changes.
Caution: Be selective when using “Clear All Formatting” to avoid unintentionally removing other styles.
Tips for Effective Highlighting
- Use sparingly: Over-highlighting can reduce readability. Reserve highlights for critical points or annotations.
- Choose contrasting colors: Ensure the highlight color contrasts with the text (e.g., yellow highlight with black text) for visibility.
- Combine with other formatting: Pair highlighting with bold or underline for added emphasis.
- Collaborate effectively: Assign different highlight colors to multiple reviewers to track changes or comments in shared documents.